Home • Help • Administrator Tools
Notification Configuration
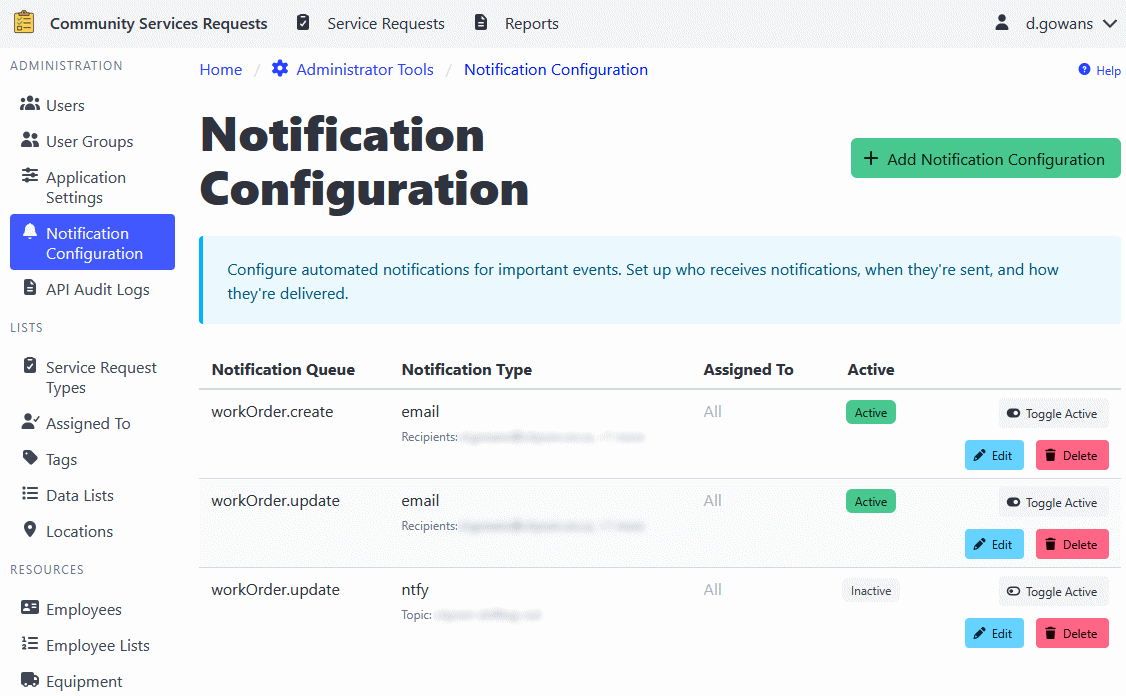
The Notification Configuration section allows administrators to set up automated notifications for various events in ShiftLog. This feature ensures that the right people are notified about important activities, assignments, and updates in real-time.
Overview
Notification configurations determine:
- What triggers a notification (notification queue type)
- How the notification is sent (notification type/protocol)
- Who receives the notification (assigned to item)
- When notifications are active (active/inactive status)
Notification Queue Types
Different events in ShiftLog can trigger notifications:
- Work Order Created - When a new work order is created
- Work Order Update - When a work order is changed
Notification Types (Protocols)
ShiftLog supports multiple notification delivery methods:
- Email - Send notifications via email.
- Ntfy - Send phone and browser notifications through the ntfy notification service.
- MS Teams - POST notification data to a webhook URL.
⚠️ Note: Notification protocols must be configured in the application settings before they can be used in notification configurations.
Adding a Notification Configuration
- Navigate to Administrator Tools > Notification Configuration.
- Click the Add Notification Configuration button.
- Select a Notification Queue (the event that triggers the notification).
- Select a Notification Type (how the notification will be sent).
- Select an Assigned To item (who should receive the notification).
- Set the Active status (whether the notification is enabled).
- Click Add to create the configuration.
Editing a Notification Configuration
- Navigate to Administrator Tools > Notification Configuration.
- Find the configuration you want to edit.
- Click the Edit button.
- Update the notification settings as needed.
- Click Save to apply changes.
Activating/Deactivating Notifications
Notification configurations can be temporarily disabled without deleting them:
- Navigate to Administrator Tools > Notification Configuration.
- Find the configuration you want to enable or disable.
- Toggle the Active checkbox.
- Click Save to apply the change.
Active configurations will send notifications when triggered. Inactive configurations will not send notifications, but remain in the system.
Deleting a Notification Configuration
- Navigate to Administrator Tools > Notification Configuration.
- Find the configuration you want to delete.
- Click the Delete button.
- Confirm the deletion.
Understanding Assigned To Items
The Assigned To field determines who receives the notification:
- Must match an item from the Assigned To Management section
- Can represent individuals, departments, teams, or roles
- The actual delivery addresses (email, phone) are configured separately in the notification protocol settings
Testing Notifications
To verify that notifications are working correctly:
- Create a test notification configuration.
- Trigger the event (e.g., create a test work order).
- Verify that the notification is received.
- Review logs if notifications are not being delivered.
Troubleshooting
Notifications Not Sending
- Check configuration is active - Ensure the Active checkbox is checked.
- Verify protocol setup - Confirm notification protocols are configured in settings.
- Check assigned to mapping - Verify the assigned to item has delivery addresses.
- Review system logs - Check application logs for error messages.
Duplicate Notifications
- Multiple configurations for the same queue type will send multiple notifications.
- Review and consolidate configurations if receiving duplicates.
Best Practices
- Start with test configurations - Test notifications before deploying widely.
- Use descriptive names - Choose clear assigned to names for easy identification.
- Limit notifications - Only notify for critical events to avoid alert fatigue.
- Monitor delivery - Regularly check that notifications are being delivered.
- Document recipients - Keep records of who receives what notifications.
- Review periodically - Audit notification configurations regularly.